Available as of version 6.1.0
Step-by-step guide
Begin with Ruckus Steps
Step 01
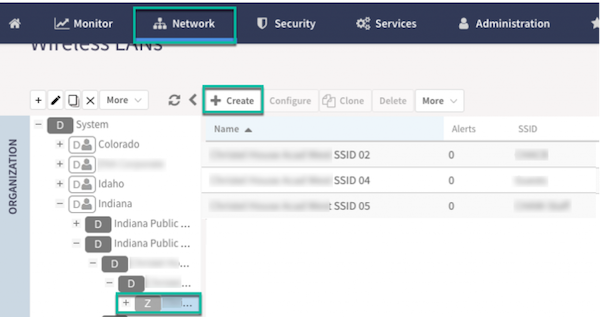
In the vSZ GUI, navigate to ‘Network > Wireless LANs. Then navigate to the Zone you wish to add the Social Login SSID. and select ‘Create.’
Step 02
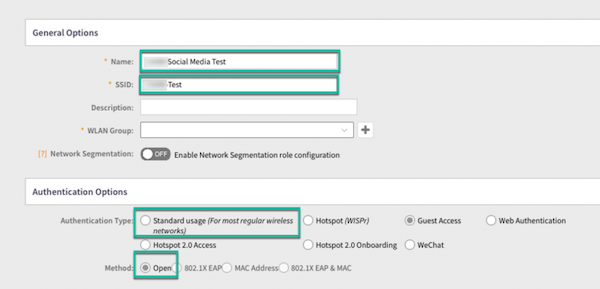
Name the WLAN and SSID. Then use Standard or Guest as the Authentication. Then choose Method “Open.“
Step 03
Encryption Options use WPA2 for Standard SSID or None for Guest.

Step 04
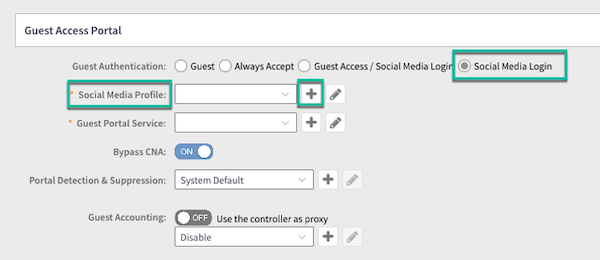
Scroll down to Guest Access Portal, select ‘Social Media Login‘
In ‘Social Media Profile‘ click the ‘+‘ icon to create the profile
Step 05
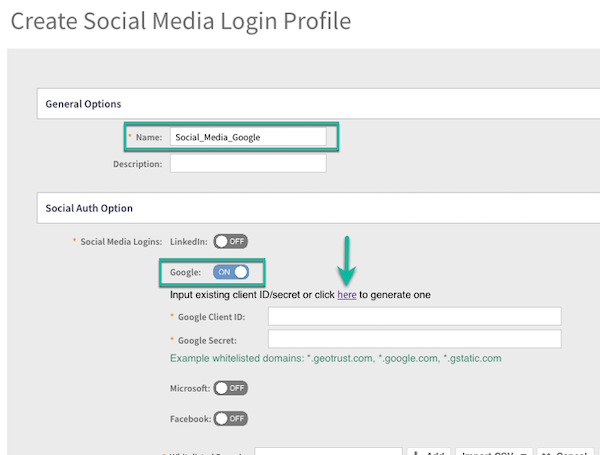
Name the social media profile and in Social Auth Option turn ‘ON‘ the toggle for Google and click the ‘here‘ button
Google Steps
The customer must have access to their Google Admin Console and their website. The customer may have to place a DNS TXT record to prove ownership of the domain.
Step 06
When you click on “here,” you will be redirected to the Google APIs section of your Google account. You must login, accept the terms of service, and click on “+ Create Project”

Step 07
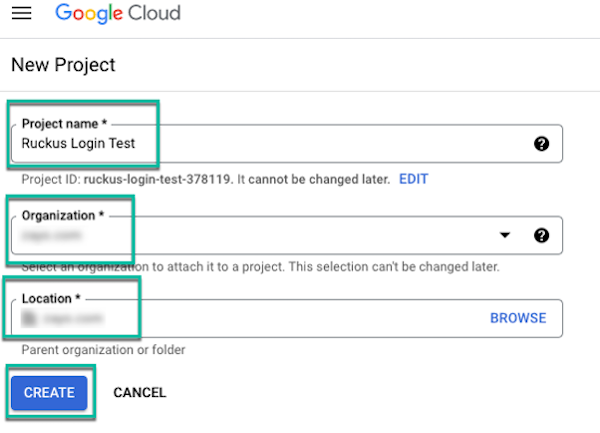
Enter Project Name, Organization, and Location then click Create.
Step 08
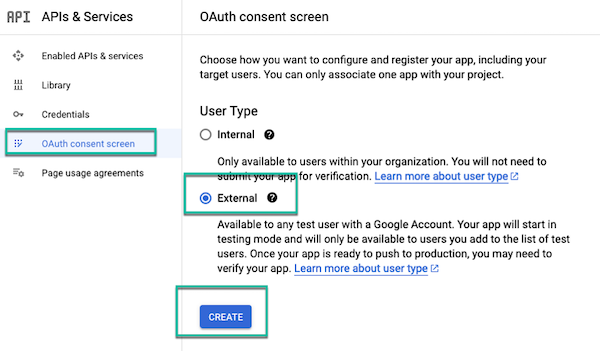
Once the project has been created, go to the OAuth consent screen, select External, and click Create.
Step 09
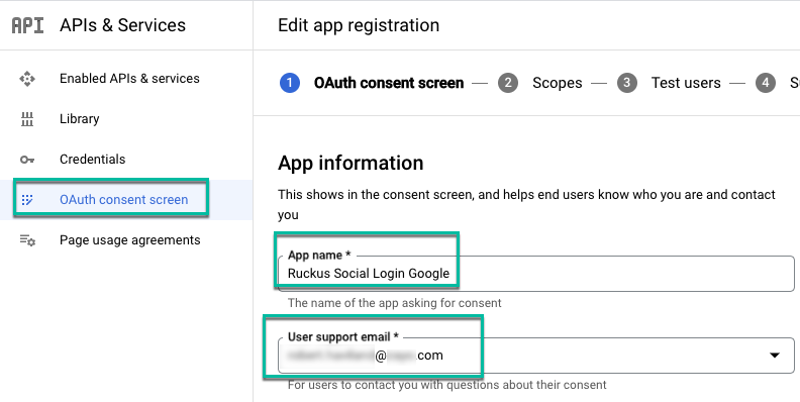
Under App information, complete the following steps:
- For App name, enter the application name.
- For User support email, select an email address from the list.
Step 10
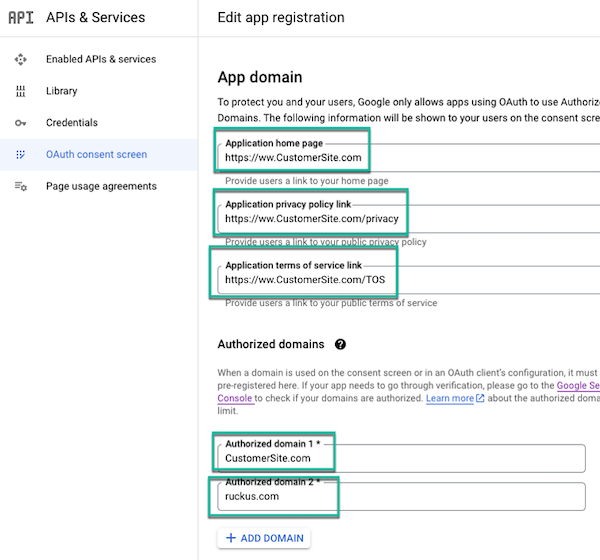
Enter the Customer’s links to their homepage, Privacy page, and TOS page.
Enter the authorized domains. This would be the customer’s domain and Ruckus.com. This is whitelisting them.
Step 11
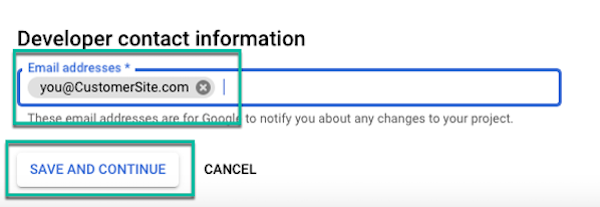
For Developer contact information, enter a valid email address and click SAVE AND CONTINUE.
- In the Edit app registration > Scopes page, click SAVE AND CONTINUE.
- In the Edit app registration > Test users page, click SAVE AND CONTINUE.
Step 12
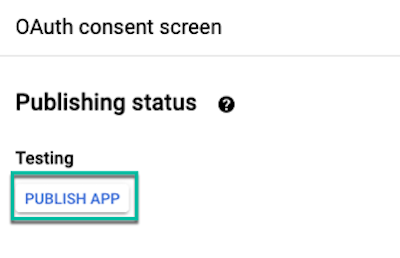
On the OAuth consent screen, click PUBLISH APP.
Step 13
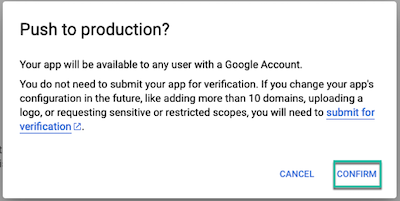
In the Push to production dialog box, click Confirm.
Step 14
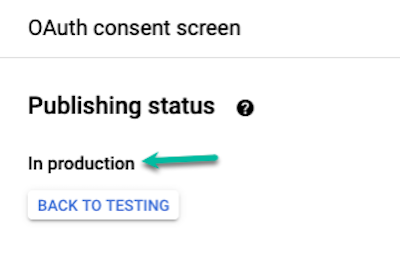
Under Publishing status, change the status to In production.
Step 15
Go to the Credentials page and click CREATE CREDENTIALS and select OAuth client ID.

Step 16
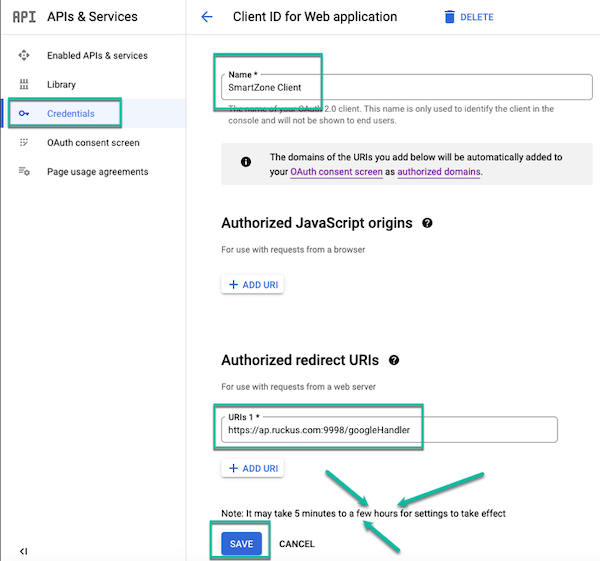
For Application type, select Web application and for Authorized redirect URIs, Enter https://ap.ruckus.com:9998/googleHandler
Yes, ruckus.com is not a legitimate URL. However, the AP will resolve this address to the PUBLIC IP of the vSZ.
Step 17
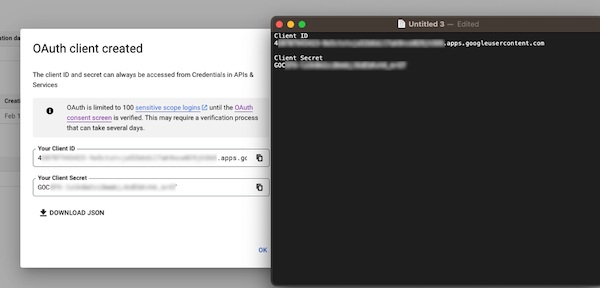
Click Create. If successful, Google displays the Client ID and Client Secret, as shown in the following figure.
Copy it to NotePad/TextEdit.
Ruckus Steps, part 2
Step 18
The Google Client ID and Google Secret should be copied back in the Ruckus Setup, should it not copy automatically.
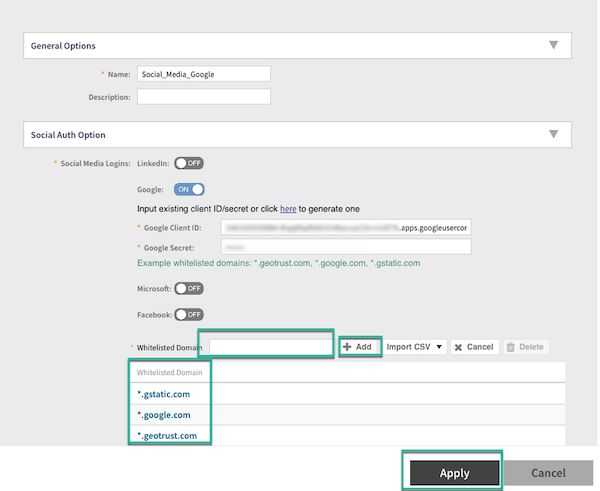
Then add these Whitelisted Domains:
*.geotrust.com
*.google.com
*.gstatic.com
Step 19
The next step is to create a ‘Guest Portal Service‘ by clicking the ‘+‘ icon

Step 20
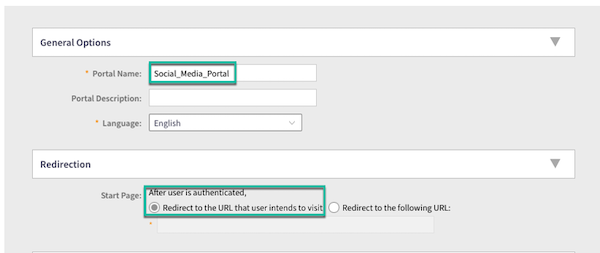
Enter the ‘Portal name’ then click ‘Apply‘ (It can be modified based on requirement).
Step 21
You can change the user session timer. The default is 1440 Minutes or 24 Hours. The Grace Period must be shorter than the Session Timeout

For this example, all other settings including VLAN assignment for end-user devices are set to the default values.
Next click ‘OK’
This may take a while for all of the settings to finalize and propagate. Be patient.
Examples of connecting a device
iPhone
Choose the SSID for 2FA
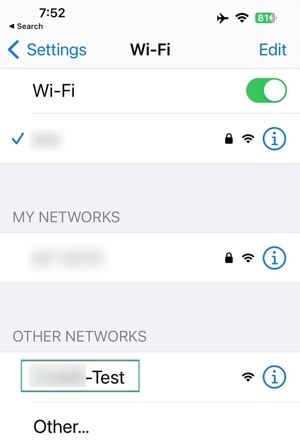
Notice the Wi-Fi symbol disappears
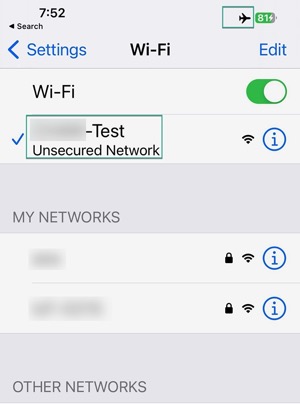
The SSID may say “No Internet Connection”
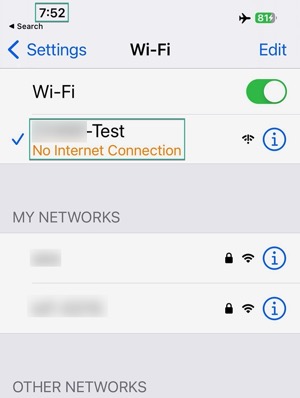
It will take about a minute for an iPhone to connect. The Wi-Fi symbol will reappear.
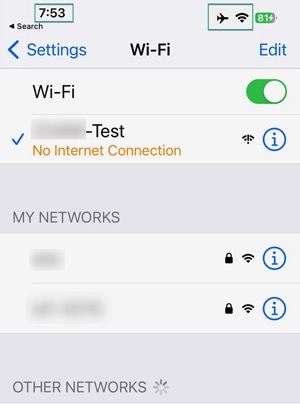
Open a browser and go to a website
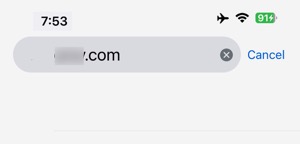
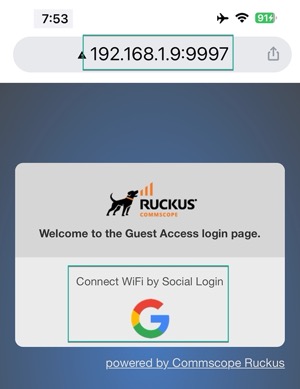
You will get the option to click on the Google logo. If other options were available, they would also be presented.
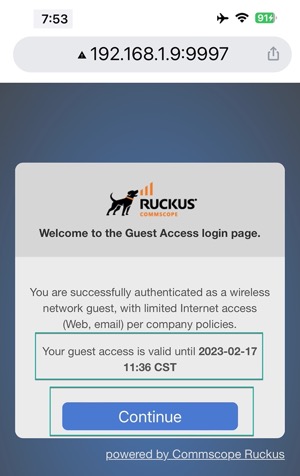
If successful, you will see the success message and how long until your session expires.
In testing, the iPhone is very slow. It may take up to a minute for the iPhone to connect. iPads and Kindles tested to be very fast.
