
Sometimes, you get tasked to create a WLAN design for a site that you have never seen before. All Wireless Engineers want to go on-site every time. However, there are times in which you just cannot go. Such is the case for a site I just received.
In looking through old documentation I saw a file that made me happy. An old Ekahau file was in the file folder.
The process I use to look at the wall attenuation is to set Ekahau to “Signal Strength” and “Selected AP only.”

Go to the wall you are interested in the measurements. Click on an AP on one side of the wall. Then click on a spot near the wall but not on it. Get that RSSI. Then go to the other side of the wall and hover over a few spots. It is preferred to look at several spots to get an idea of what the wall area is like.
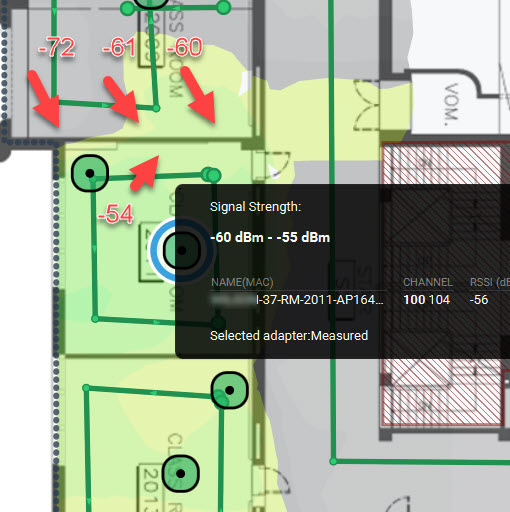
A lot of times the middle will look weaker than the sides because of interactive whiteboards. They have a lot of electronics and metal. The problem with this method is that you are not sure at what height the signal was recorded. In this case